Skills, prompts and MCP
Beyond provider routing, Nexus Composer also manages Codex’s skills, prompts, and MCP servers, and logs local usage with estimated cost.
Skills, prompts and MCP servers are Codex’s own features, so this page is specific to Codex — the agent Composer supports today. More agents are being added, and each brings its own tooling.
Skills
Section titled “Skills”Skills are packaged instructions Codex loads for a task.
- Open Skills and choose Discover Skills.
- Search your configured repositories, or
skills.sh. - Read the description and check the source.
- Choose Install, then restart or refresh Codex if needed.
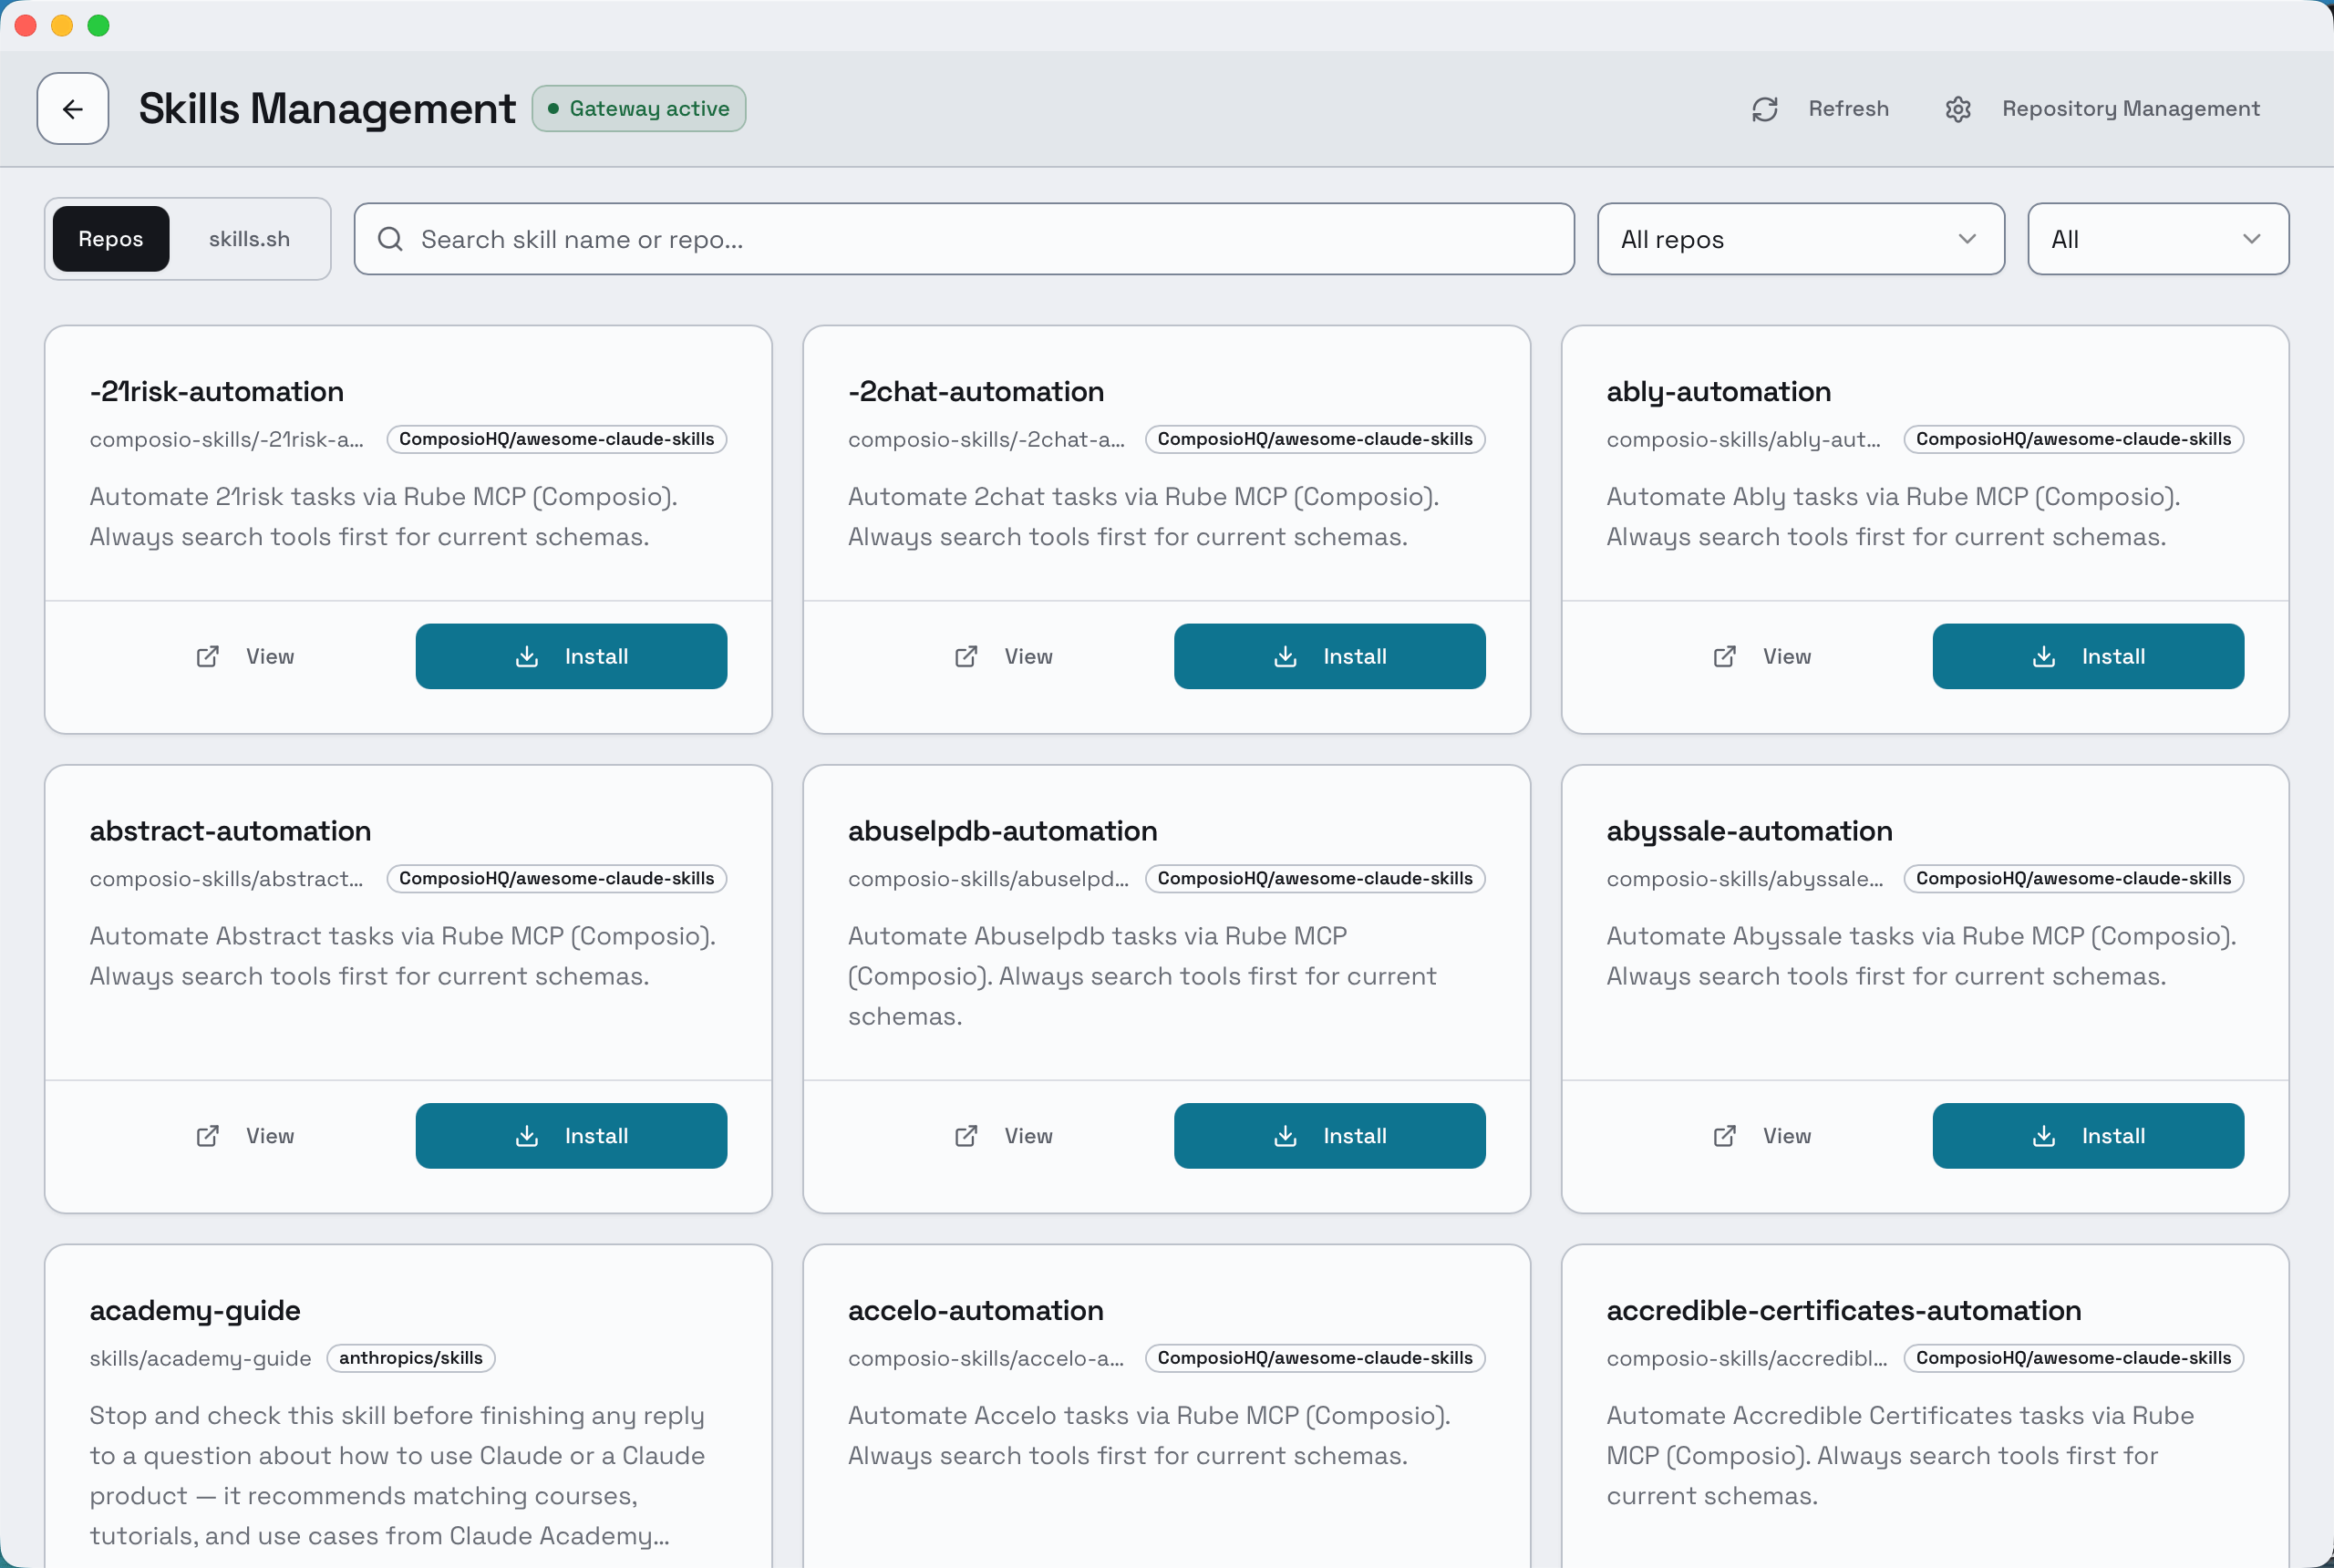
The badge under each name is the source repository — that is the part to read before Install.
Prompts
Section titled “Prompts”- Open Prompts and choose Add Prompt.
- Give it a clear name and, optionally, a description.
- Add the prompt content and save.
- Enable the prompts you want Codex to use.
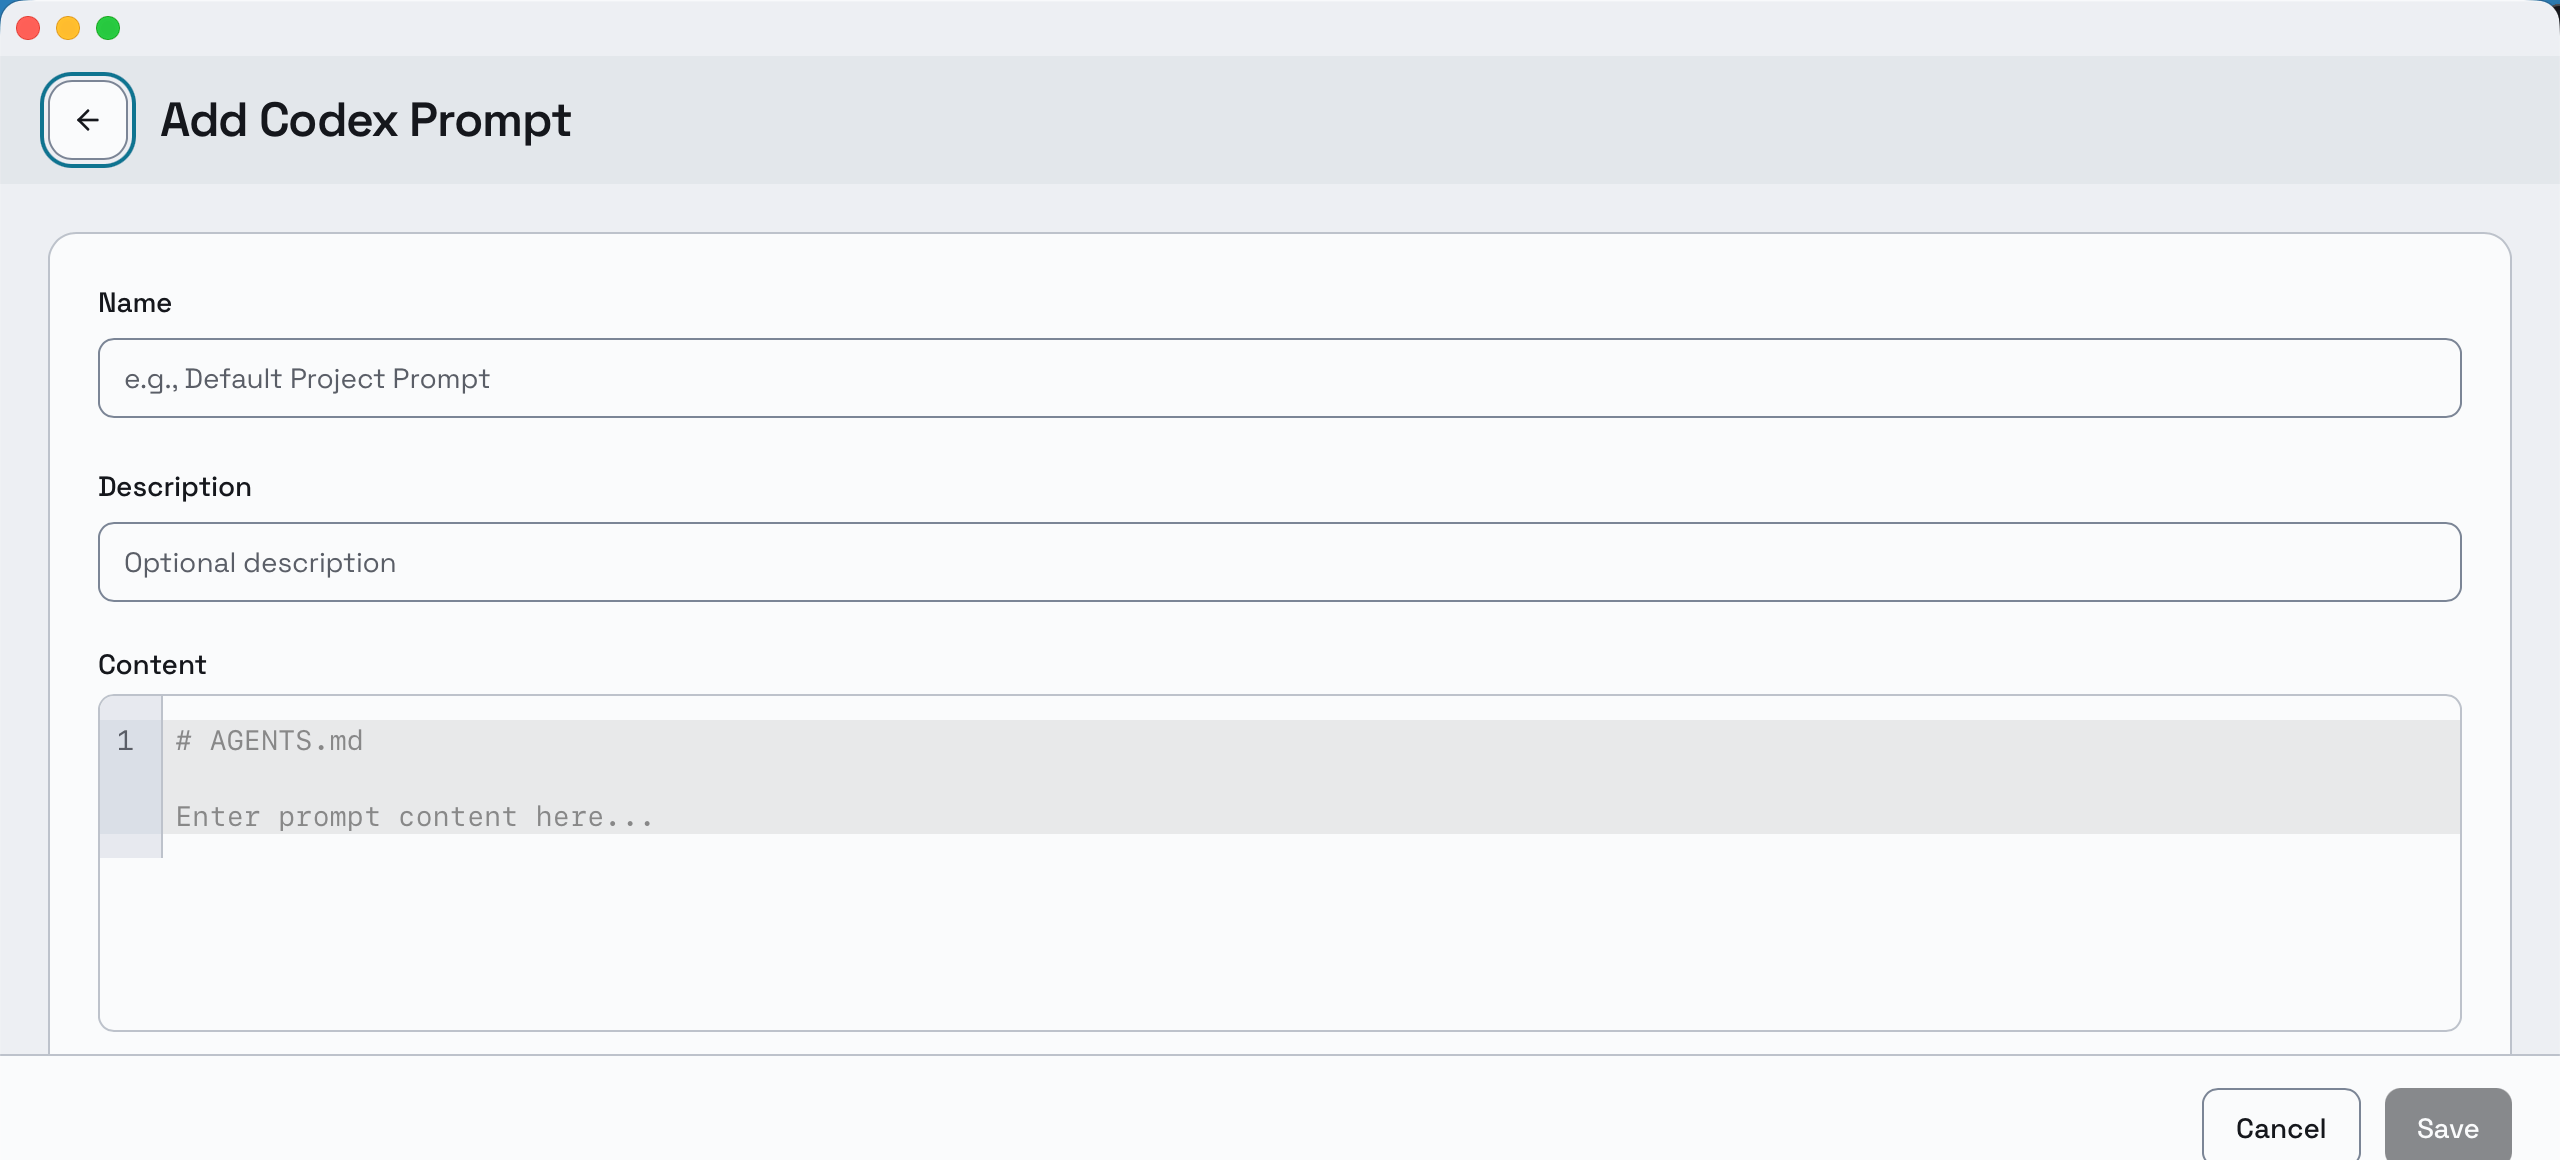
Saving adds the prompt; enabling it on the list is a separate step.
MCP servers
Section titled “MCP servers”MCP servers give Codex tools — file access, search, an internal API — granting whatever the server can reach.
- Open MCP and choose Add MCP.
- Enter a unique identifier and a display name.
- Choose which applications should use it.
- Configure it with the wizard, or by pasting JSON or TOML.
- Validate the command or URL, save, and restart the target client if needed.
For a local stdio server, the command it runs — npx, uvx or similar — must be installed and on the PATH Composer itself uses, not necessarily your interactive shell’s PATH.
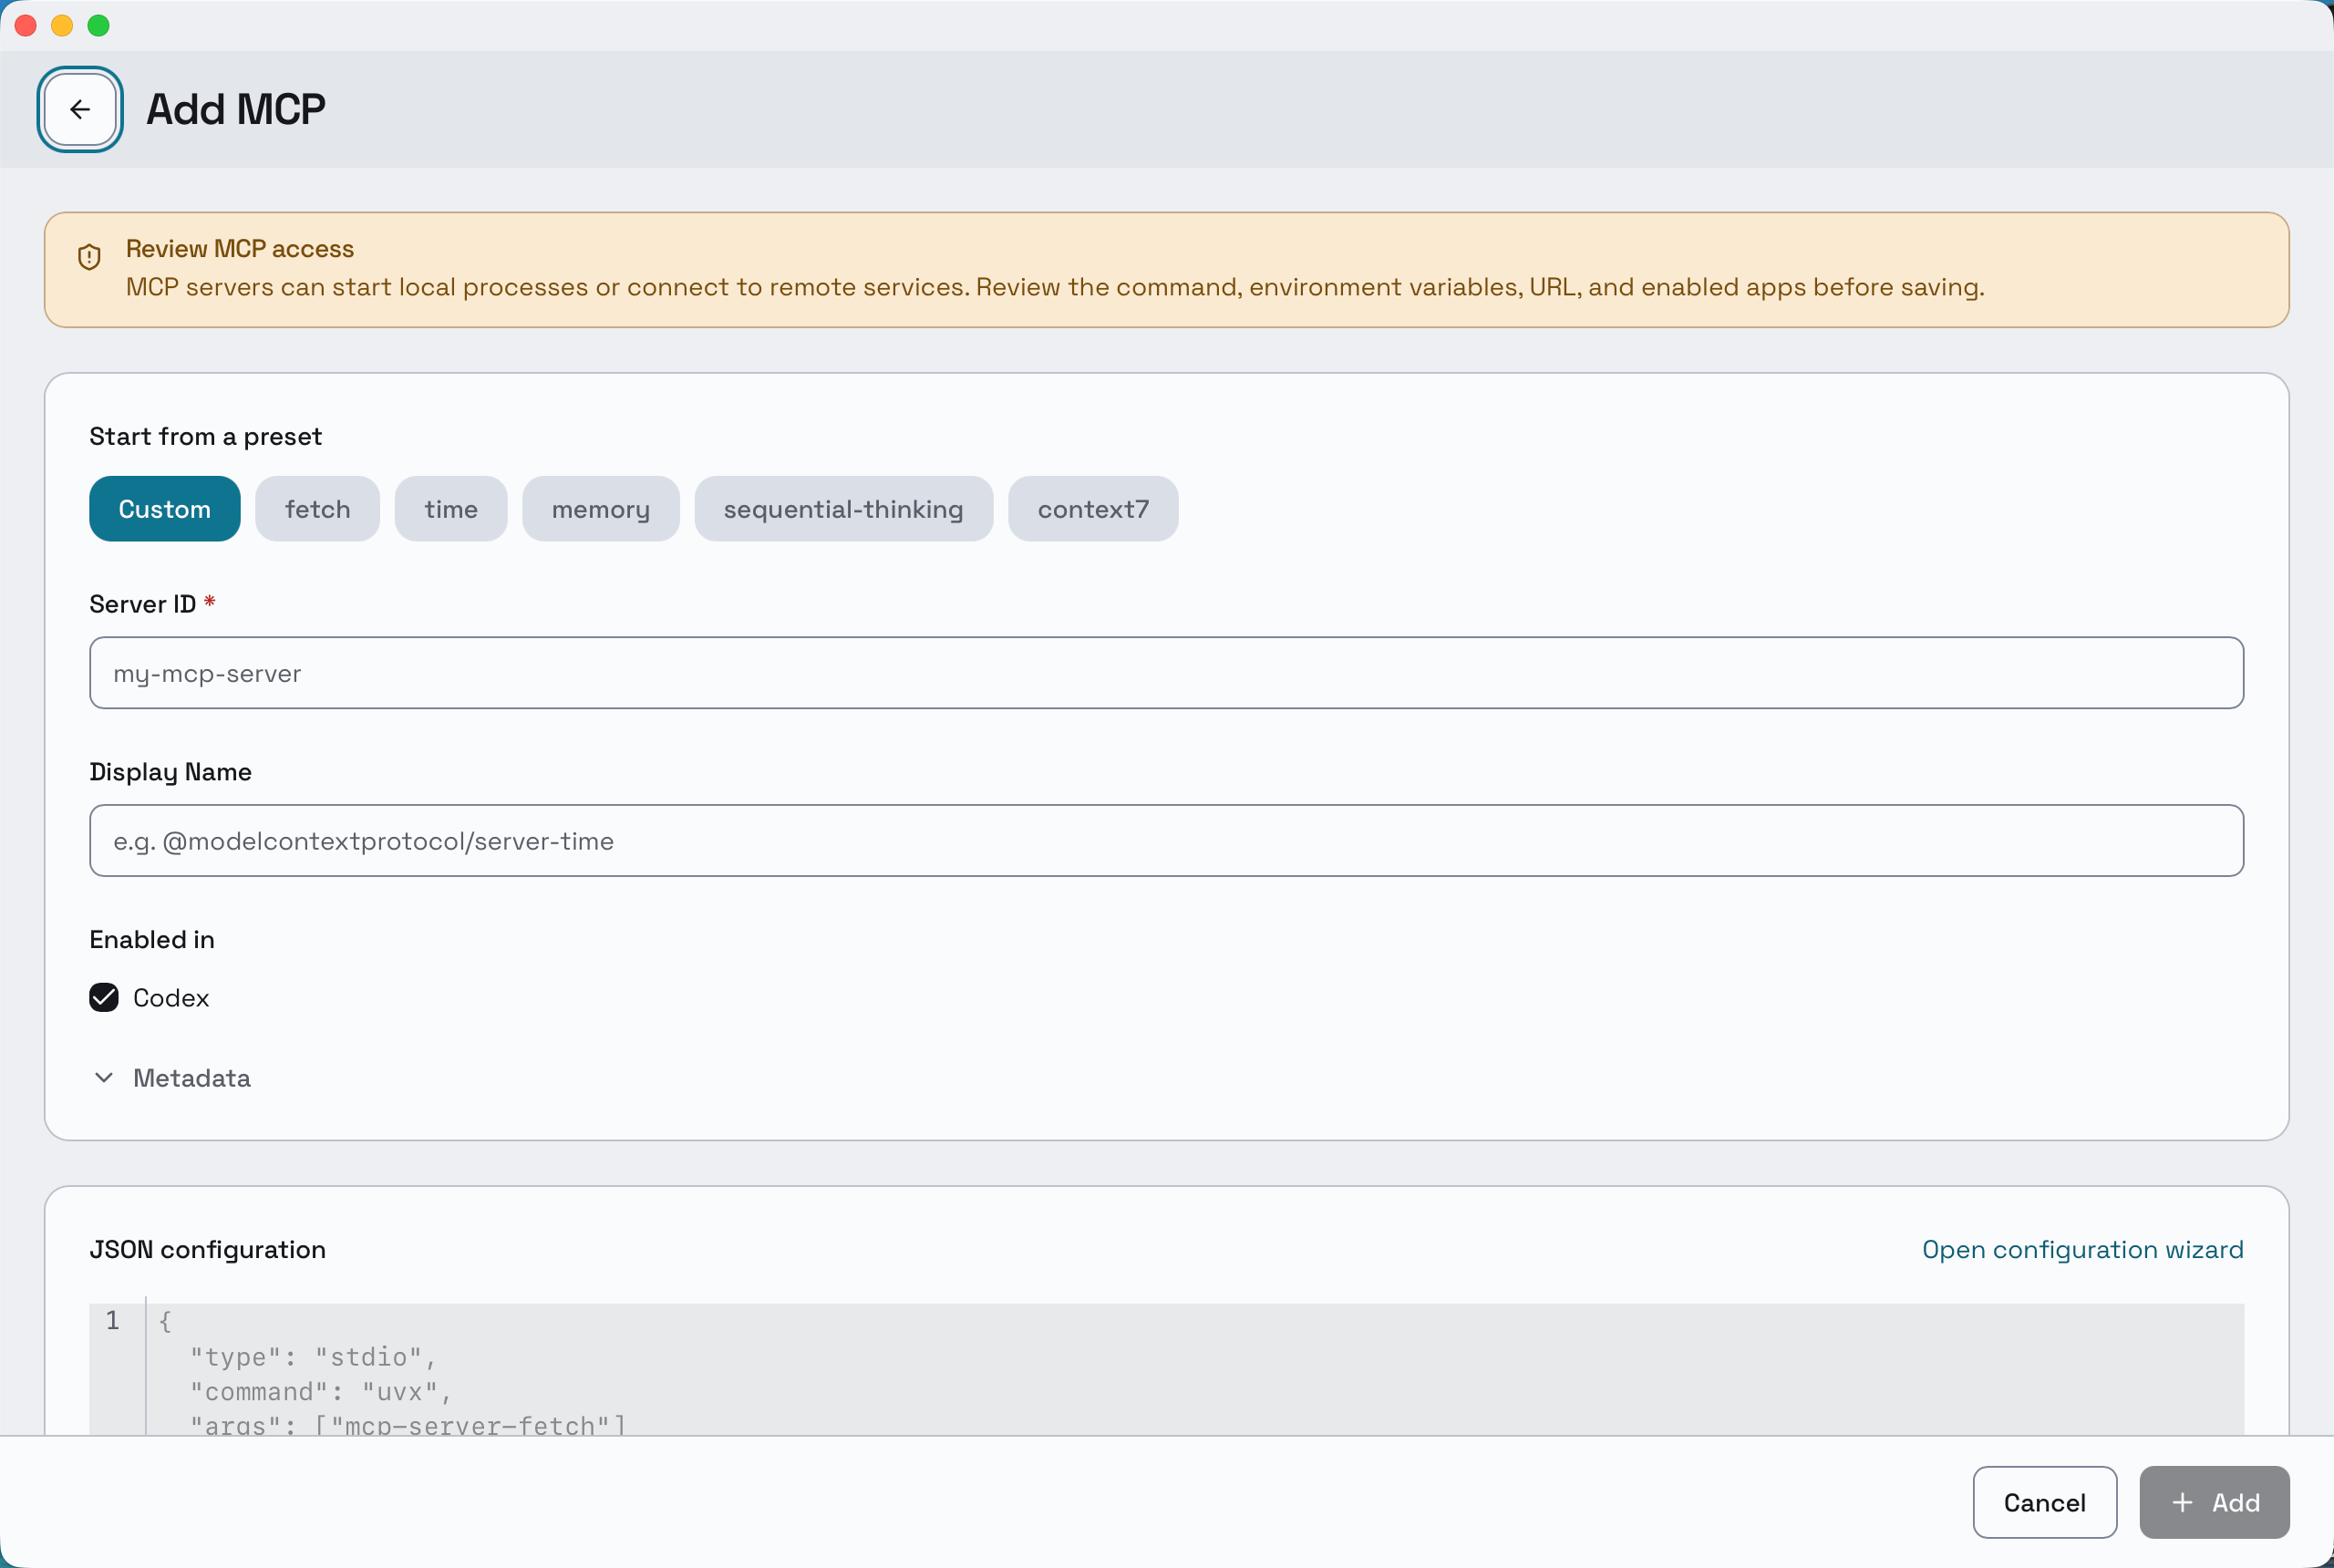
The presets fill the form for a known server; Custom is the blank one. Read the JSON before saving — it is the command that will run.
Usage statistics
Section titled “Usage statistics”Settings → Usage Statistics records completed AI requests Composer routed. Each entry can show provider, model, input/output tokens, cache reads/creation, success or failure, time to first token, end-to-end duration, prefill/decode throughput, estimated cost, and the request’s source and kind. Filter by time range, provider, model, application, request source, and user where applicable.
One request is tied to the provider selected for it; switching providers doesn’t duplicate the request or its record. Only completed requests appear, and opening Composer creates none — an empty view usually means no traffic matches the filters.
Next steps
Section titled “Next steps”- Nexus Composer — install, connect, and route a client.
- Composer troubleshooting — when a skill, server or route does not behave.