Nexus Composer
Nexus Composer is a desktop app that lets the AI agents your team already uses call OneNexus-hosted models — without switching tools, and without hand-maintained proxy settings or model IDs.
Codex Desktop, Codex CLI, and VS Code are the agents Composer supports today, and more are being added. This guide is written for Codex because it is what ships today, not because Composer is limited to it.
Composer lets you switch the active provider for a client — never both OpenAI Official and OneNexus at once. When OneNexus is selected, a local proxy converts the client’s protocol and forwards the request.
What you need
Section titled “What you need”| Requirement | Detail |
|---|---|
| Pilot access | An approved OneNexus pilot account and tenant — if you lack one, request pilot access. |
| Operating system | macOS 14 or later on Apple Silicon. Windows x64 and Linux (Ubuntu 24.04+) are coming soon. Intel Macs and Windows on ARM are not supported. |
| Client | Codex Desktop, Codex CLI, or VS Code — the agents supported today. More are being added. |
| Nexus API key | A Platform API key from the console. Open API Keys → Generate API key, set Type to Platform, and copy the secret when shown. |
| ChatGPT login | Only needed for OpenAI Official models in Codex. |
| Network | Outbound access to OneNexus, and to OpenAI when using OpenAI Official. |
An Inference key reaches only the Served Model Names of its selected self-hosted models, not the hosted catalog Composer uses. A Platform key is the credential Composer needs — it calls every published catalog model, including models added later, and cannot be narrowed. Check the Type column under API Keys if unsure: a Platform key shows Platform.
Composer checks the client versions it supports — after installing, open Settings → About for the current requirement, which changes with client releases.
Download and install Composer
Section titled “Download and install Composer”Only use installers from the official Nexus Composer download page, which validates the release manifest and every installer it currently offers before enabling a download.
If downloads are temporarily unavailable, reload the page later or contact your onboarding contact — never use an unofficial mirror.
macOS on Apple Silicon
Section titled “macOS on Apple Silicon”- Download the macOS
.dmgfrom the official page. - Open the disk image and follow its installation instructions.
- Launch Nexus Composer from Applications, then eject the disk image.
Signing and notarization may vary during the pilot. If macOS blocks the installer, confirm it’s from the official page, then ask your onboarding contact before overriding the warning.
Open Composer for the first time
Section titled “Open Composer for the first time”- Open Nexus Composer and dismiss the first-run notice after reading it.
- Open Settings with the gear icon and stay on the General tab.
You can manage the OpenAI Official route without a Nexus account. OneNexus-hosted models need the Platform key from the next section.
Connect your Nexus account
Section titled “Connect your Nexus account”Under Settings → General → Nexus Account:
- Paste your Platform key into Nexus API Key, then choose Connect.
- Wait for validation and confirm that the status reads Connected.
- Check that the displayed username and tenant are yours. Stop here and contact your onboarding contact if either is wrong.
On success, Composer validates the key, stores it in your OS credential store, downloads the managed catalog, and updates only the client profiles it manages — other Codex settings, MCP configuration, skills, and sessions stay untouched.
Use Replace API Key to connect a replacement, and Forget key to remove the stored credential.
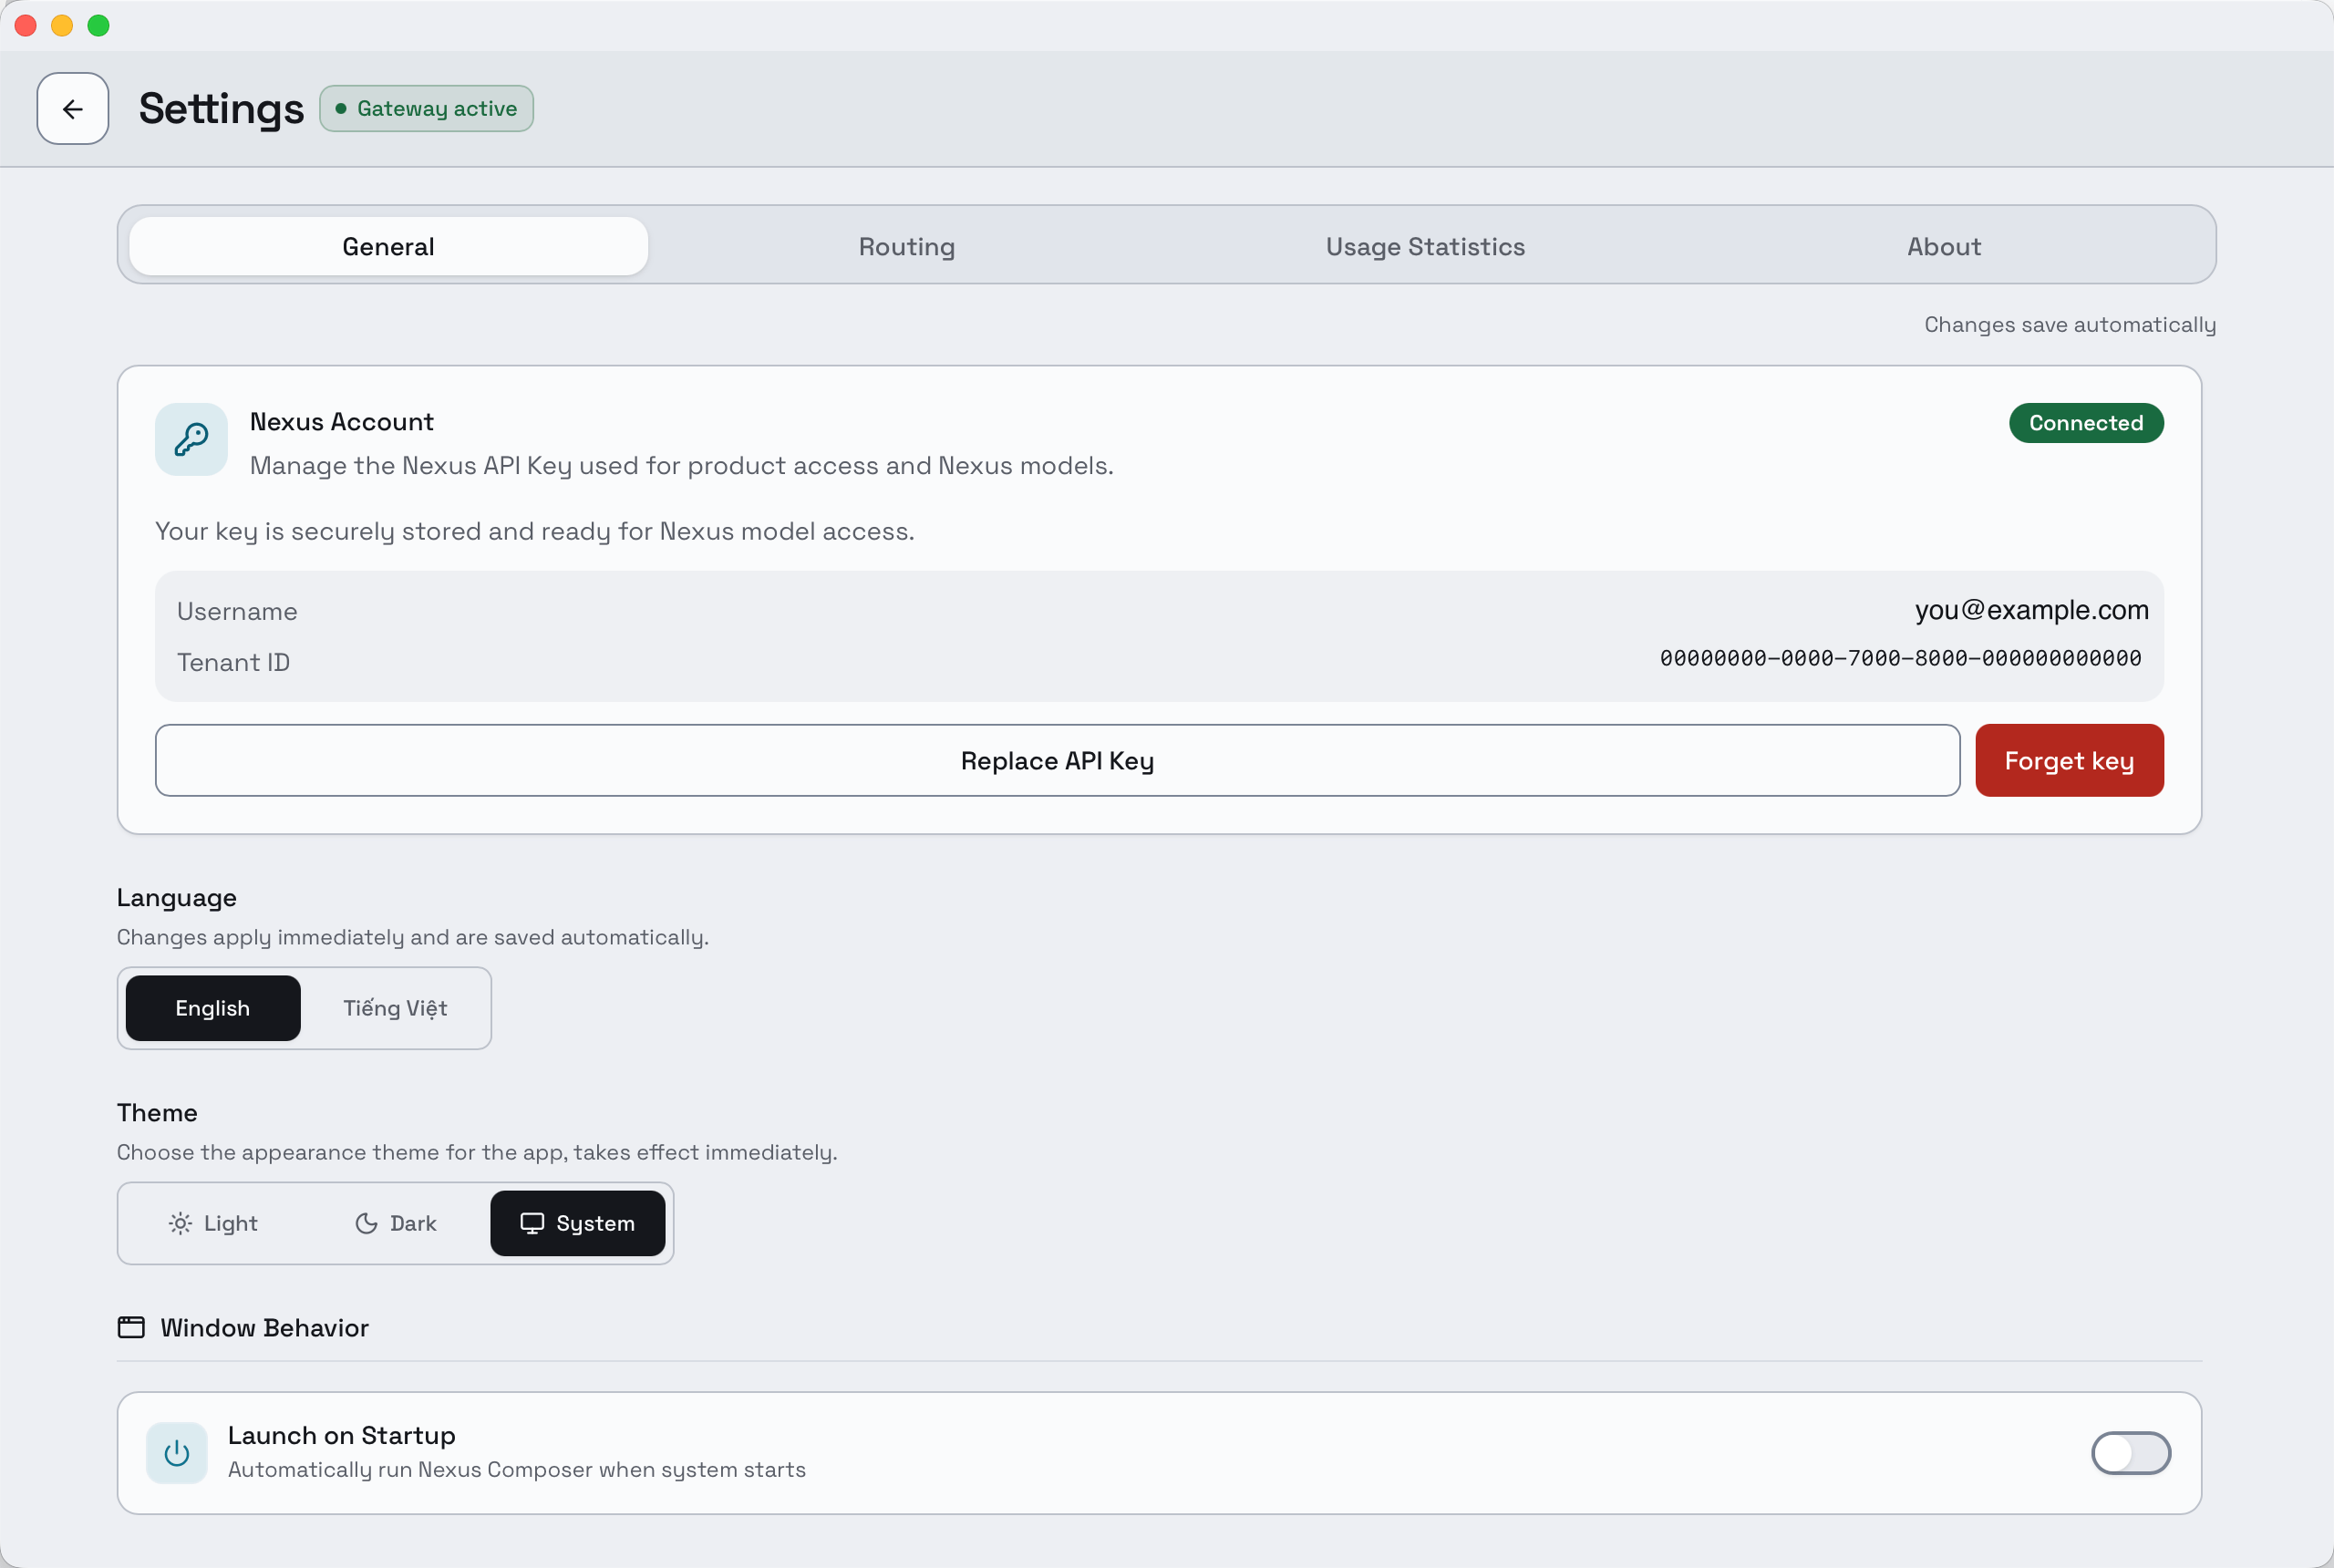
Connected plus a username and tenant you recognise. If either is wrong, stop here.
Check your client installation
Section titled “Check your client installation”Open Settings → About. Composer detects each supported client, compares found versions against required ones, and warns about conflicting installations.
If Codex CLI is missing, use Install. If Composer finds more than one Codex installation, choose Diagnose installs and confirm which executable your shell runs before changing anything.
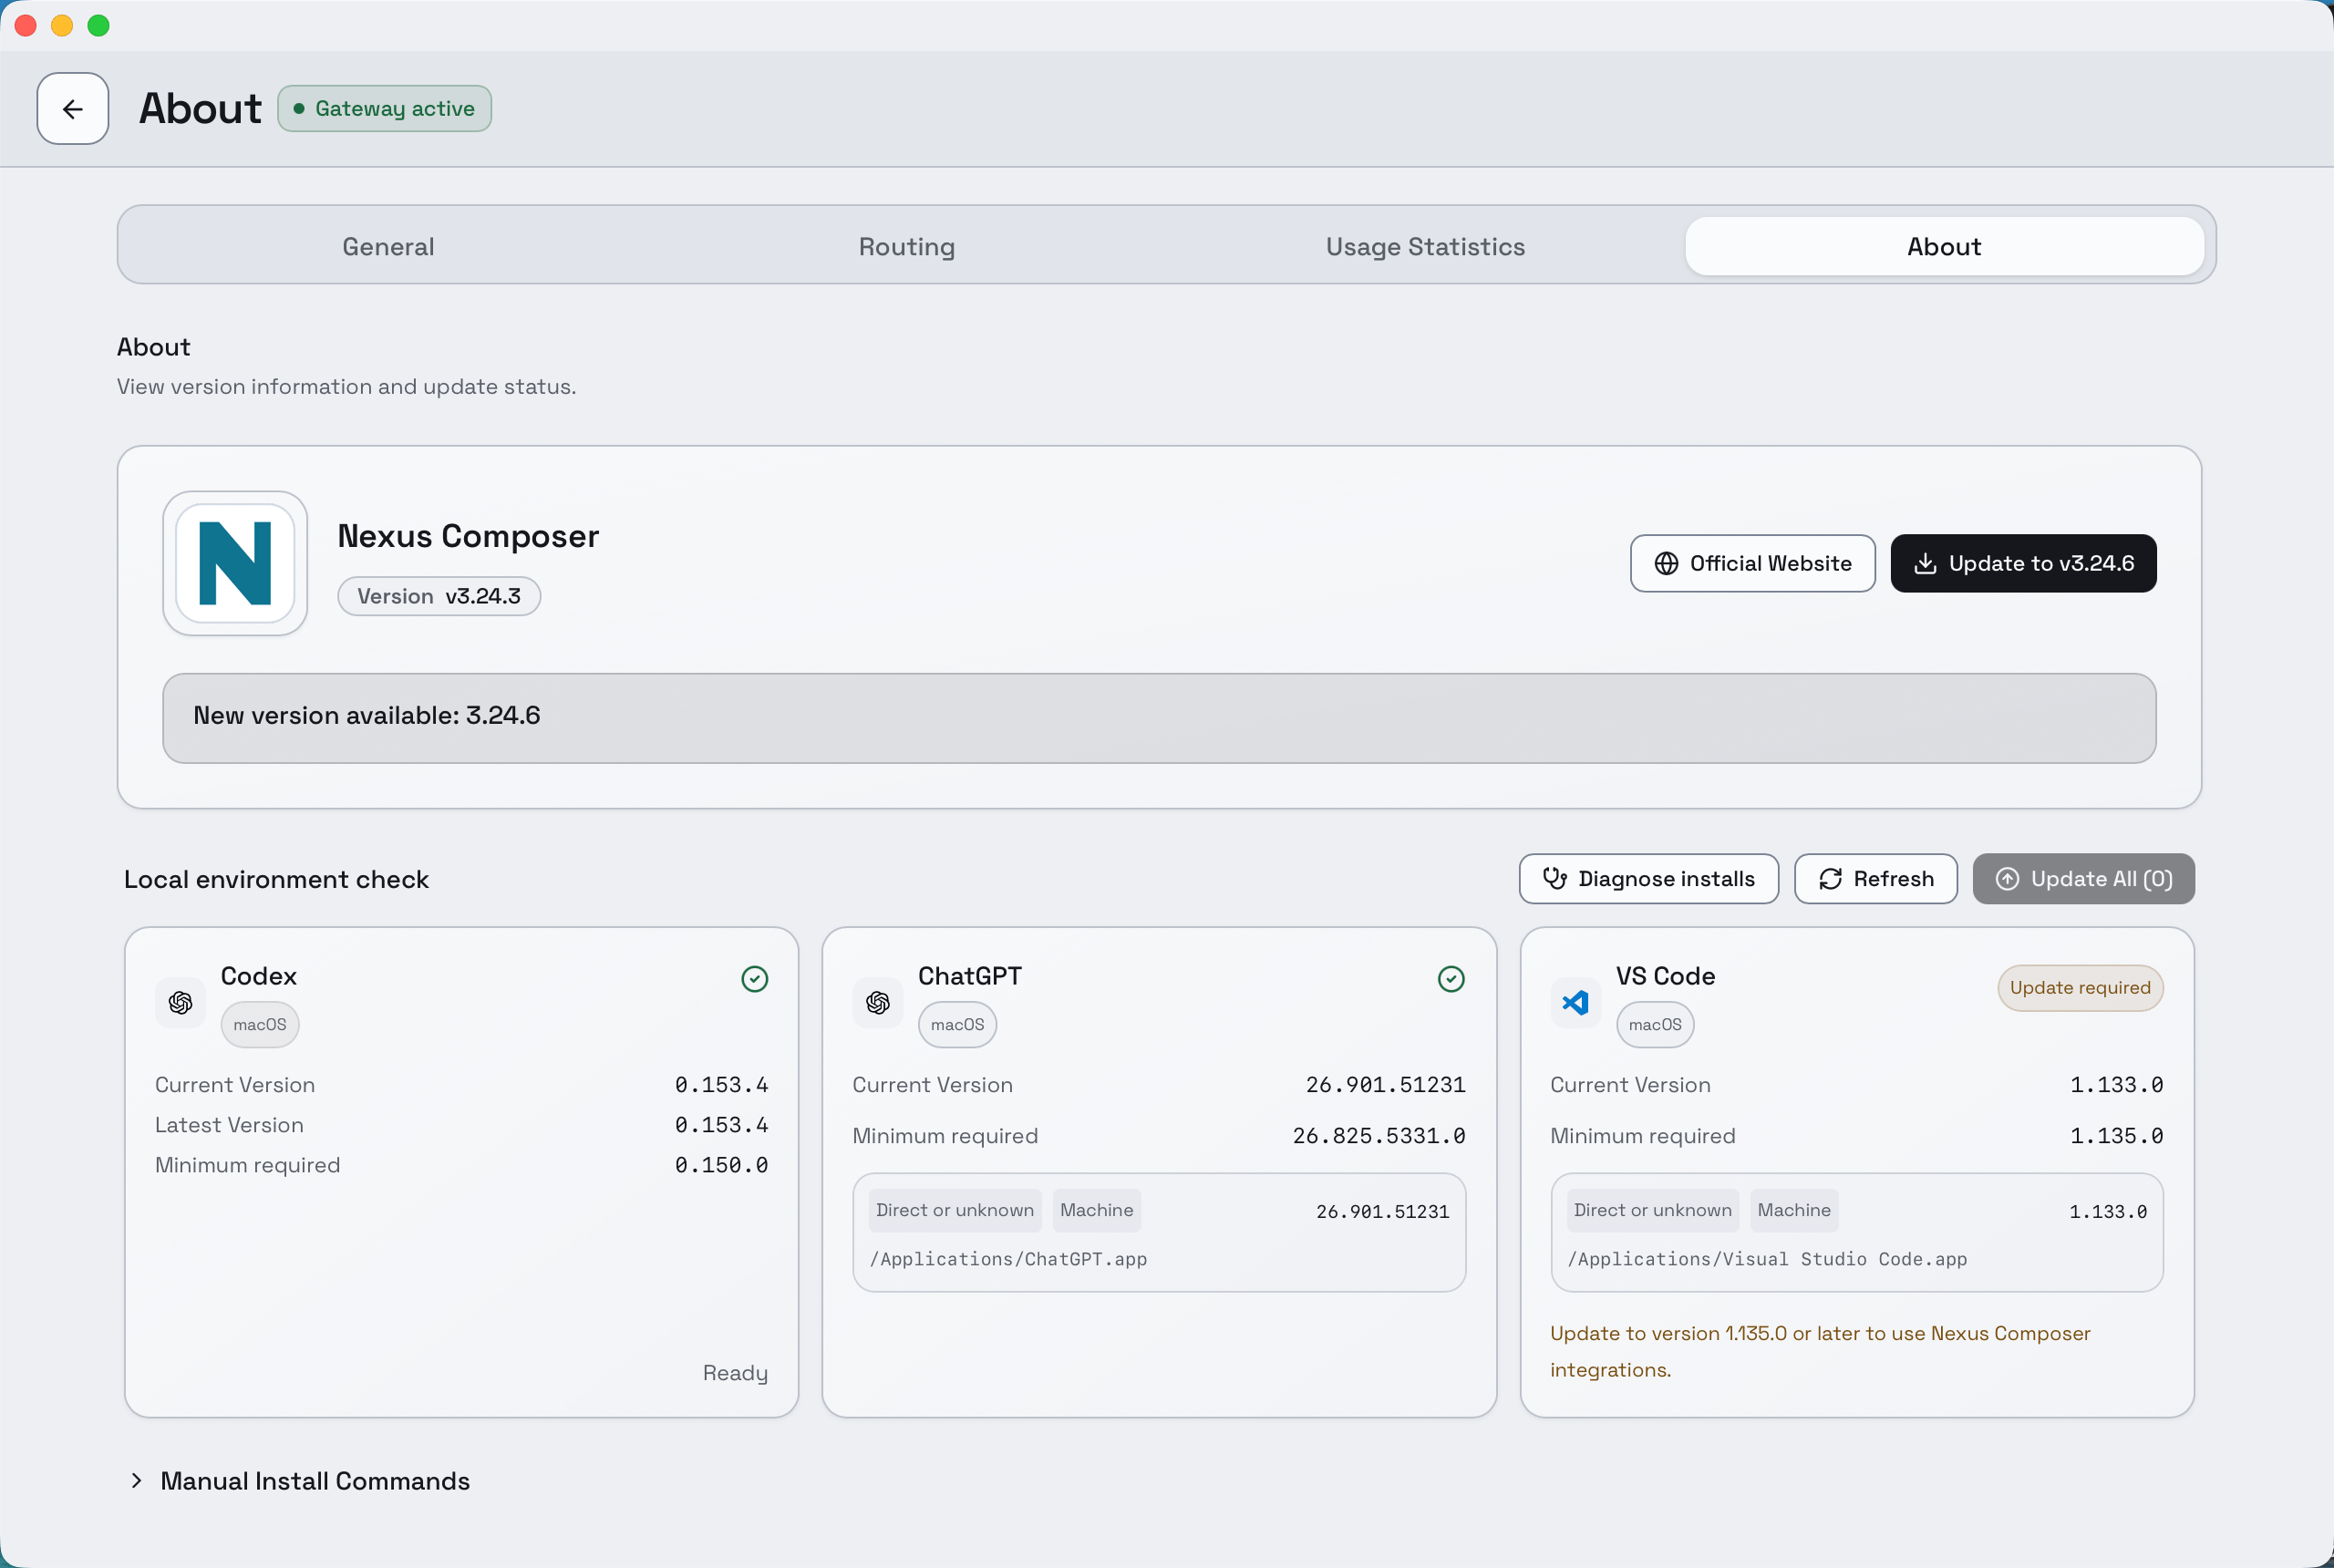
Each client is checked against the version Composer needs. Diagnose installs is the button to reach for when it finds more than one Codex.
Before your first request
Section titled “Before your first request”For this guide, start a new conversation and use only this synthetic test prompt:
Reply with exactly: OneNexus connection is working.Choose your client
Section titled “Choose your client”Composer changes the route for one client at a time. Pick yours.
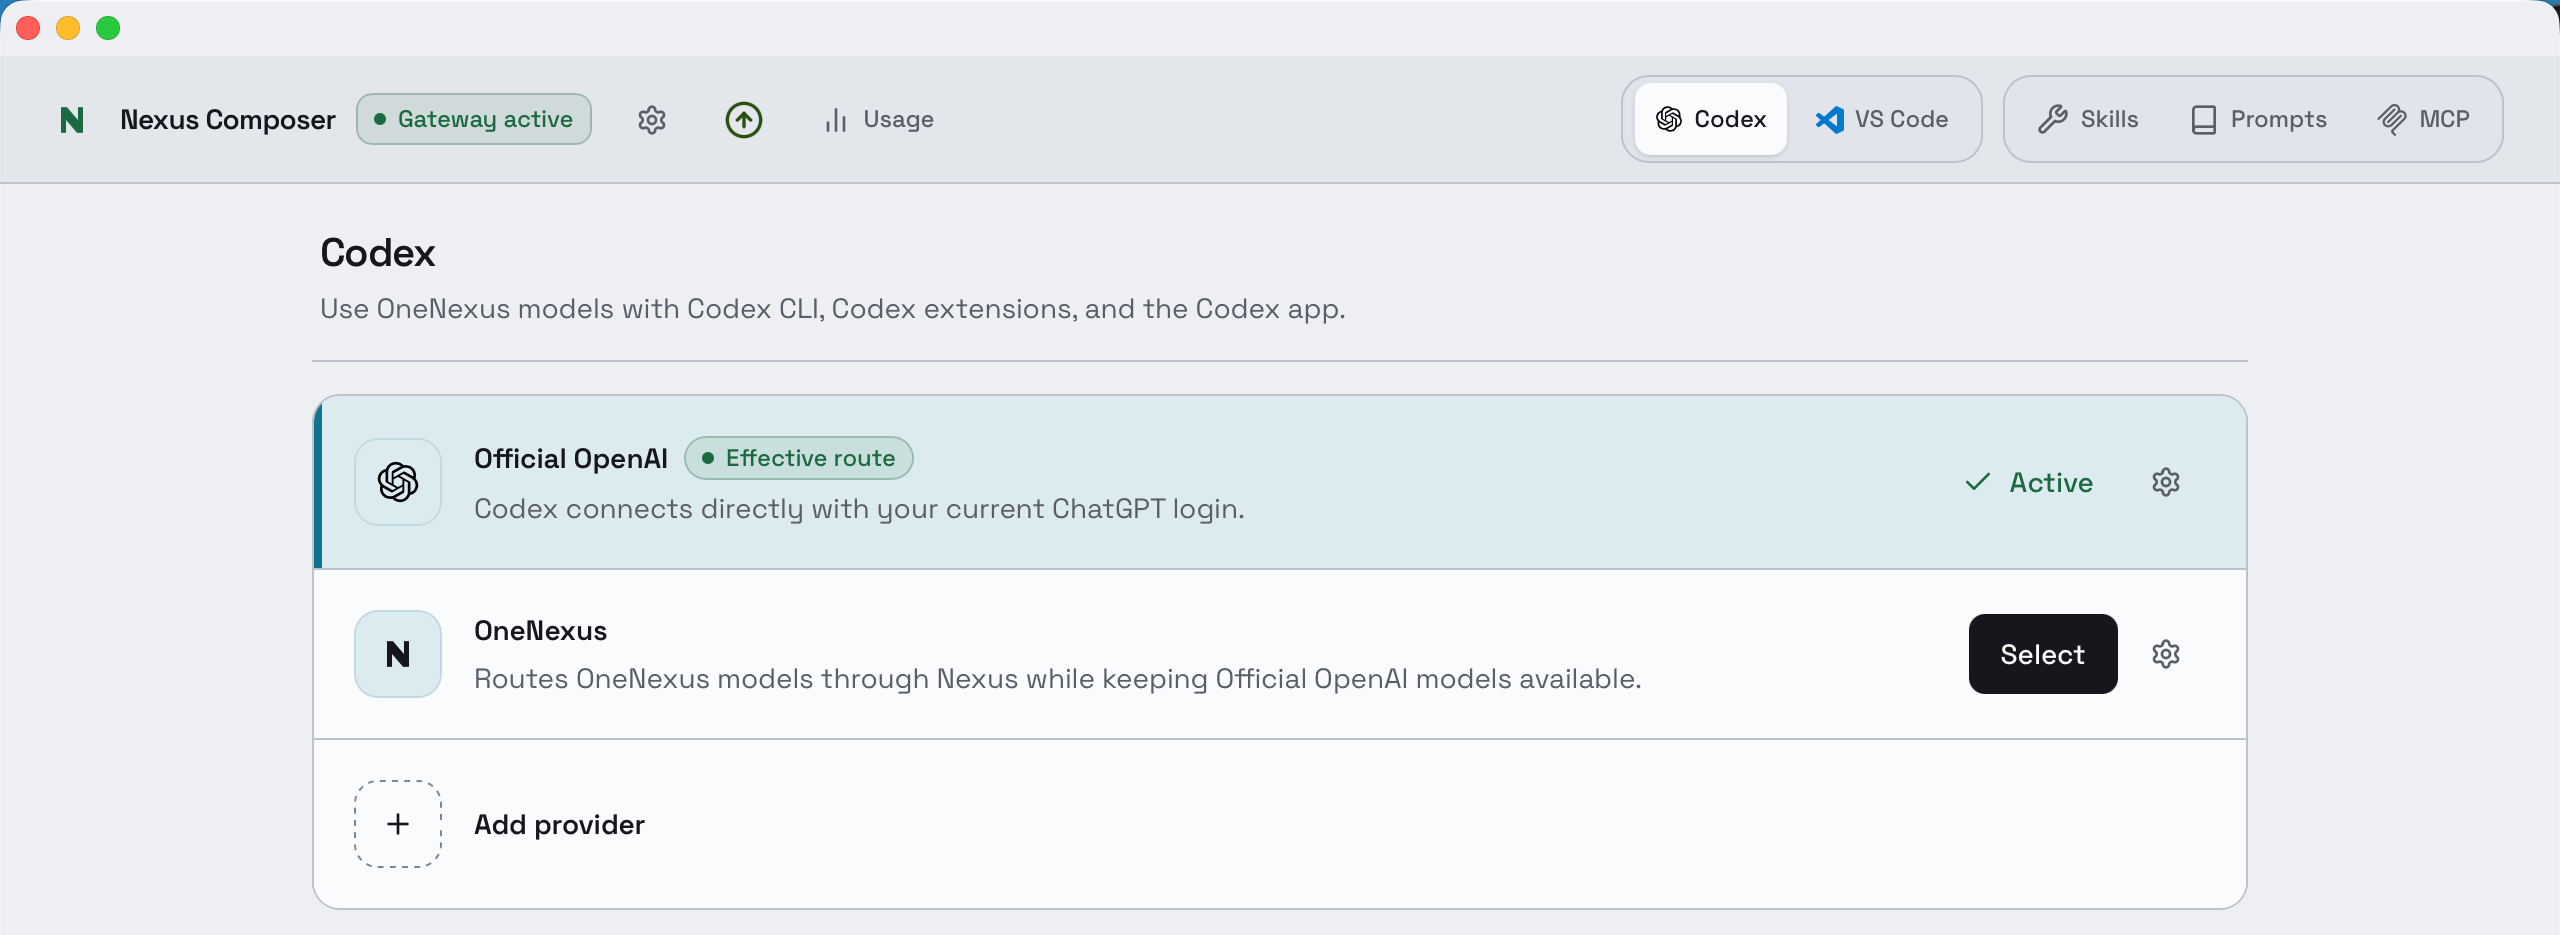
The card marked Effective route is where requests actually go.
Codex Desktop starts on OpenAI Official, and stays there until you change it — Composer shows that card as Active. OneNexus sits beside it with a Select button, and nothing moves until you press it.
-
Choose Select on the OneNexus card to route Codex through OneNexus. Wait until that card reads Active and carries no warning.
-
Quit Codex Desktop — not just its window — then reopen it. It keeps the route it started with.
-
In a new conversation, open the model picker. The OneNexus models now sit alongside the OpenAI ones — choose the one you want and start your first chat.
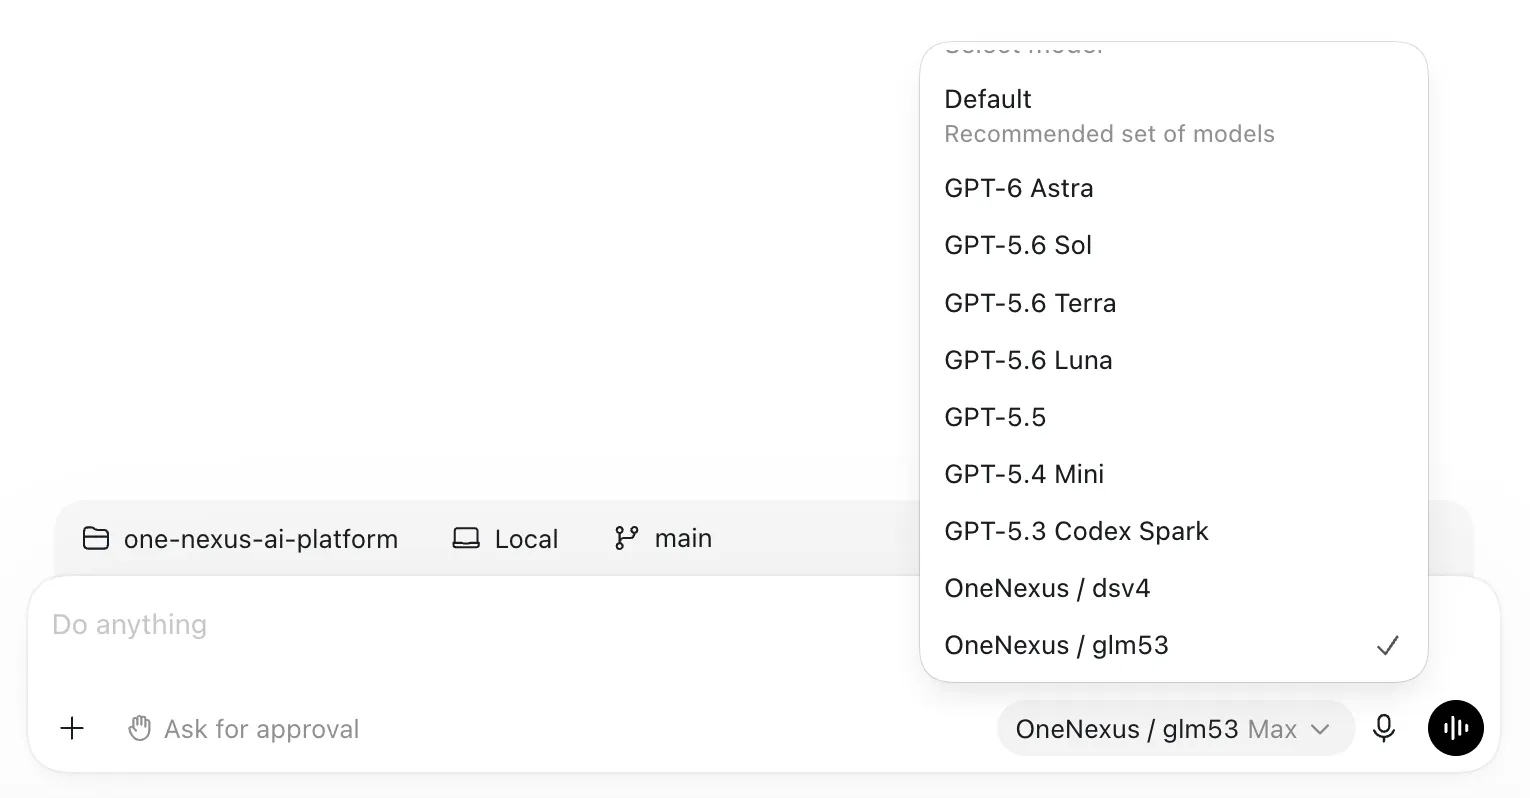
OneNexus models are prefixed with the provider, so they are easy to tell apart from the OpenAI ones.
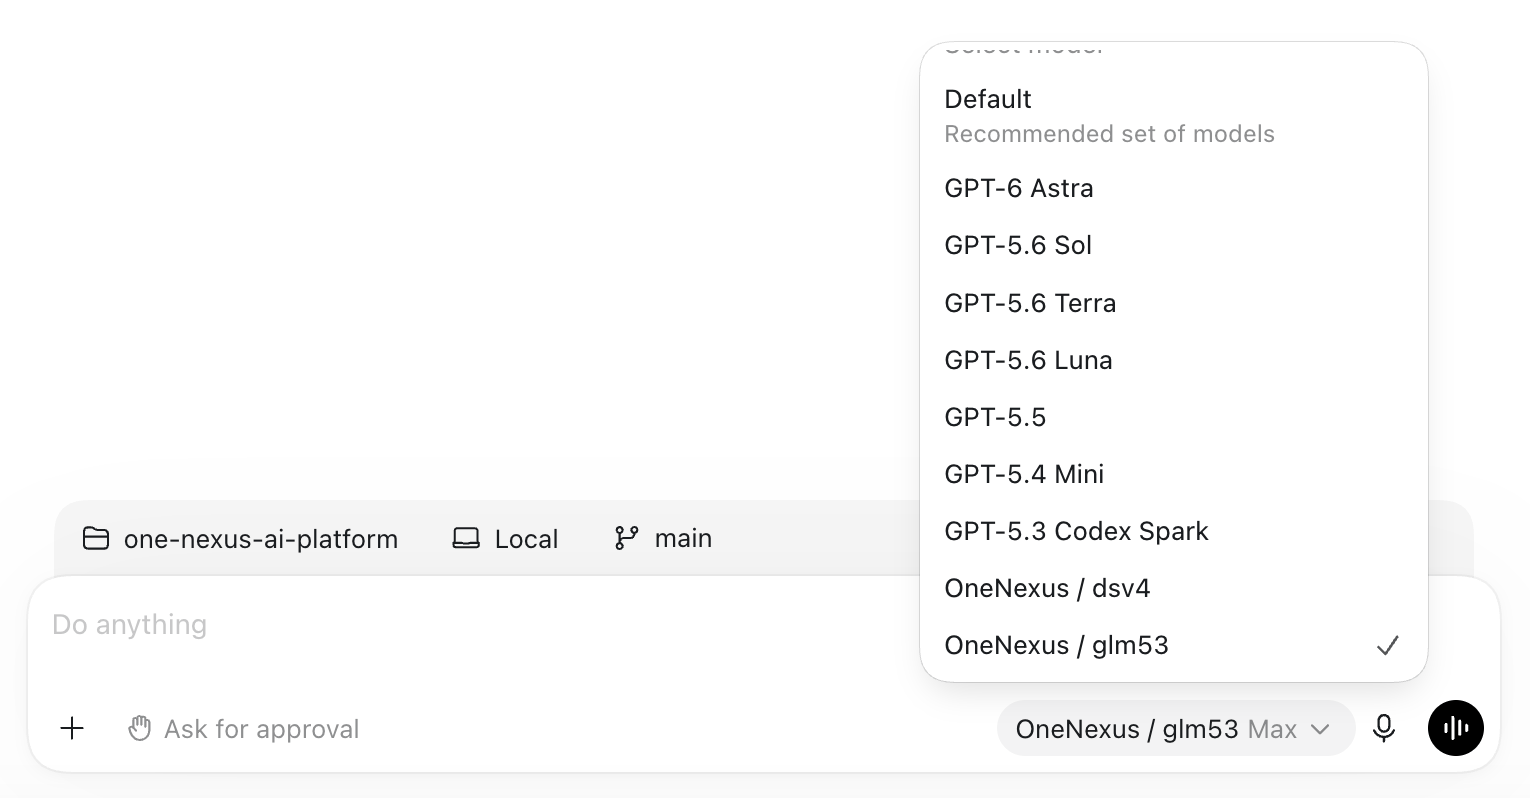
To keep OpenAI Official models selectable alongside the OneNexus ones, sign in to ChatGPT inside Codex Desktop. Composer manages the OneNexus catalog itself — what you see depends on your tenant, current availability, and whether Codex restarted after a catalog change.
Without a ChatGPT login. On the OneNexus card, open settings and enable Use OneNexus without ChatGPT sign-in, then restart Codex Desktop. This mode publishes only the compatible OneNexus catalog and may hide OpenAI Official models — leave it off to switch providers from the model picker.
One card serves both Codex clients — there is no separate route for the CLI.
Codex CLI shares Composer’s Codex route, so the card you select is the same one Codex Desktop uses.
-
Choose Select on the OneNexus card to route Codex through OneNexus. Wait until that card reads Active and carries no warning.
-
Exit every running Codex CLI process, then start Codex again in a new terminal — a running process keeps the configuration it started with.
-
Confirm a OneNexus model is selected, then start your first chat.
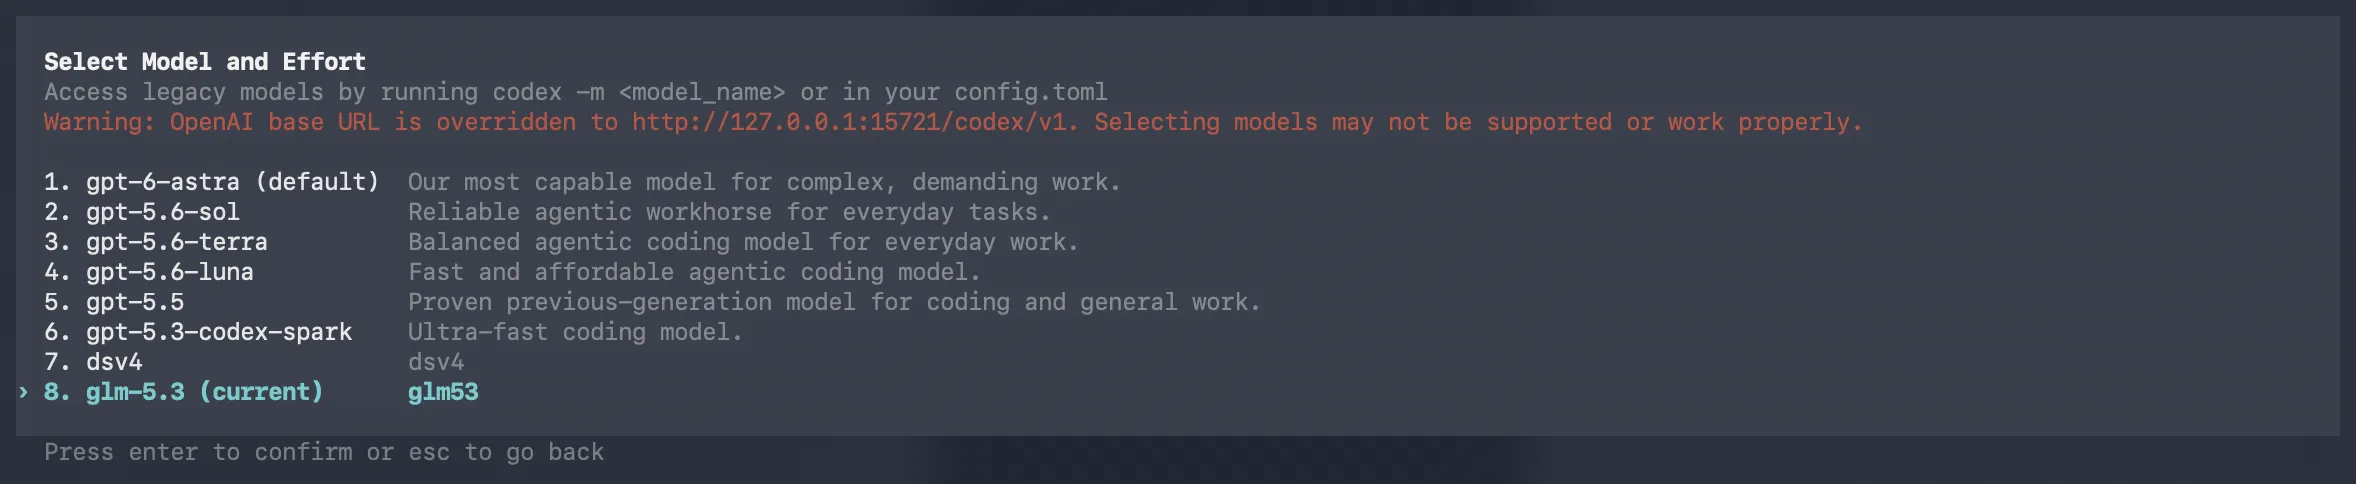
The red warning is expected: that overridden base URL is Composer’s local proxy. Unlike Codex Desktop, the CLI lists OneNexus models without a provider prefix — they are the entries below the
gpt-ones.
Restart the CLI after every provider change, not only this first one.
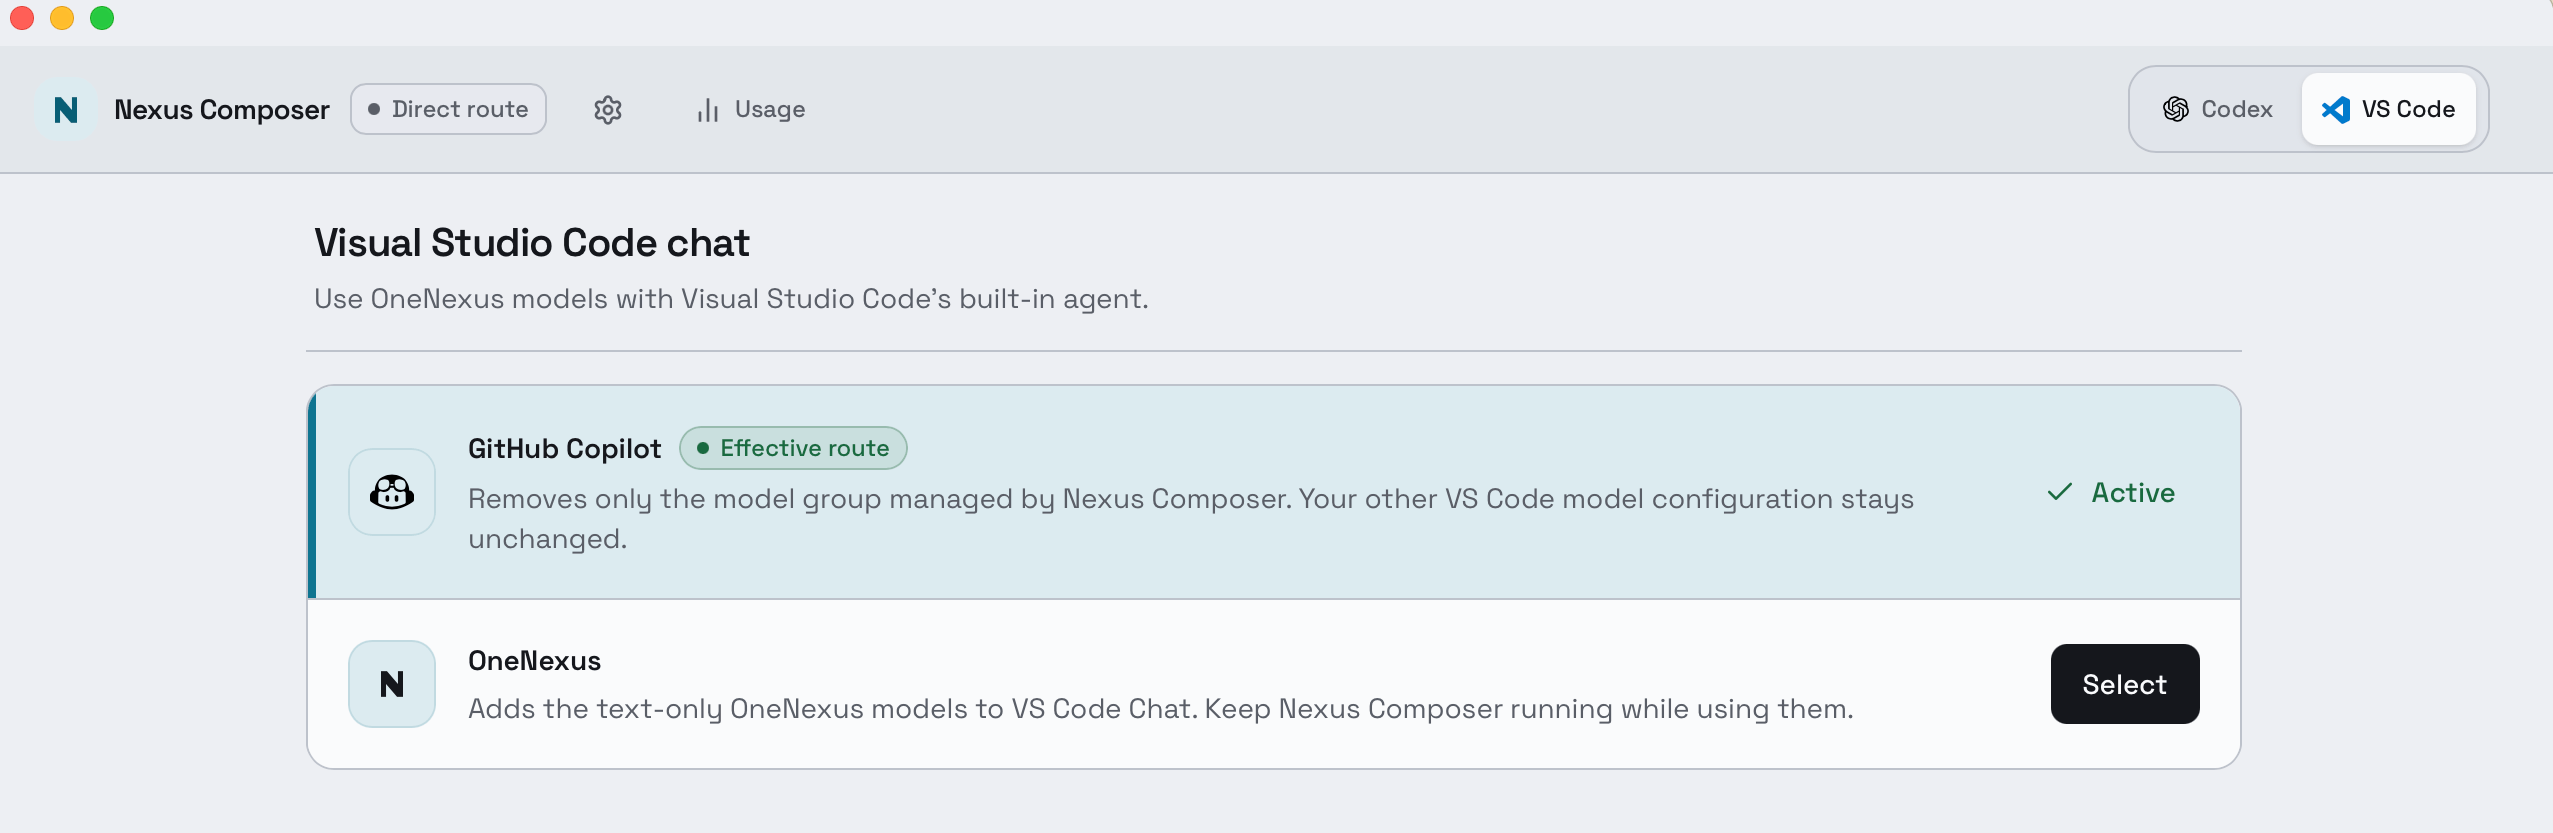
Composer’s VS Code tab opens a page titled Visual Studio Code chat.
This routes VS Code’s built-in Chat agent. It starts on GitHub Copilot and stays there until you change it — Composer shows that card as Active. OneNexus sits beside it with a Select button, and nothing moves until you press it.
-
Choose Select on the OneNexus card to route VS Code Chat through OneNexus. Wait until that card reads Active and carries no warning.
-
Open or reload VS Code so it picks up the new model group.
-
In a new Chat conversation, pick a OneNexus model and start your first chat.
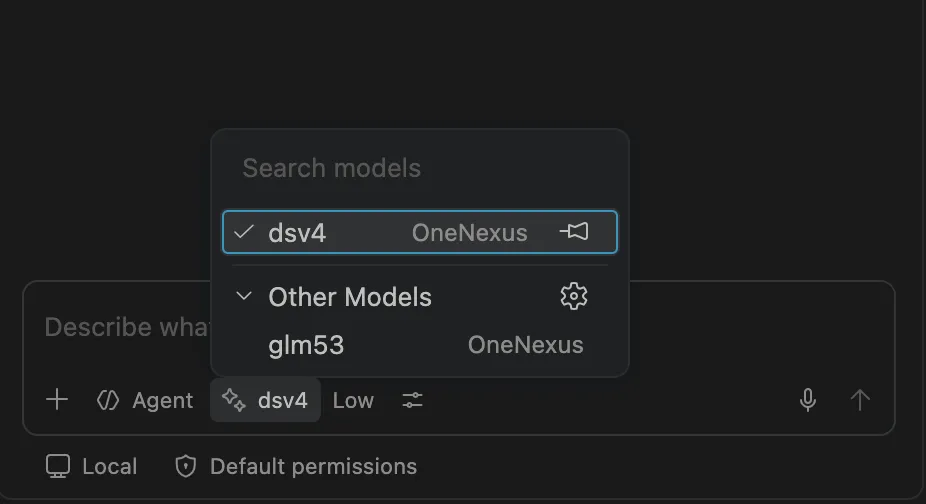
VS Code names the provider to the right of each model. Only the current one sits at the top — expand Other Models to reach the rest.
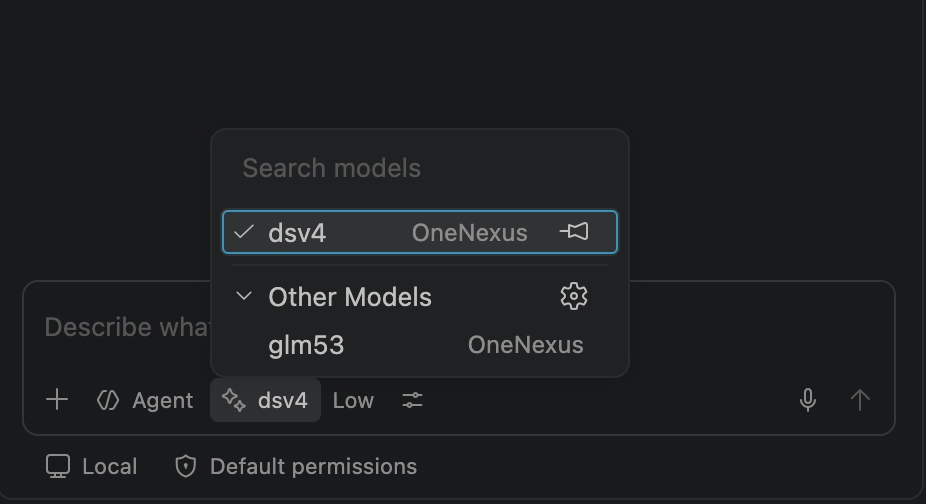
Composer adds these as a model group it manages, and in VS Code they are text only — no images or file attachments.
Usage and proxy
Section titled “Usage and proxy”The chat you just sent should appear under Settings → Usage Statistics, with its application, provider, and model. That view is Composer’s local record of the AI requests it routed — opening Composer alone creates no entry, and the displayed cost is an estimate, not an invoice. See Skills, prompts and MCP for this view’s fields and limits.
To check the proxy, open Settings → Routing, expand Local Routing, and confirm the service is Running. It listens on 127.0.0.1, bound to the loopback interface — use Restart on the same screen if unhealthy.
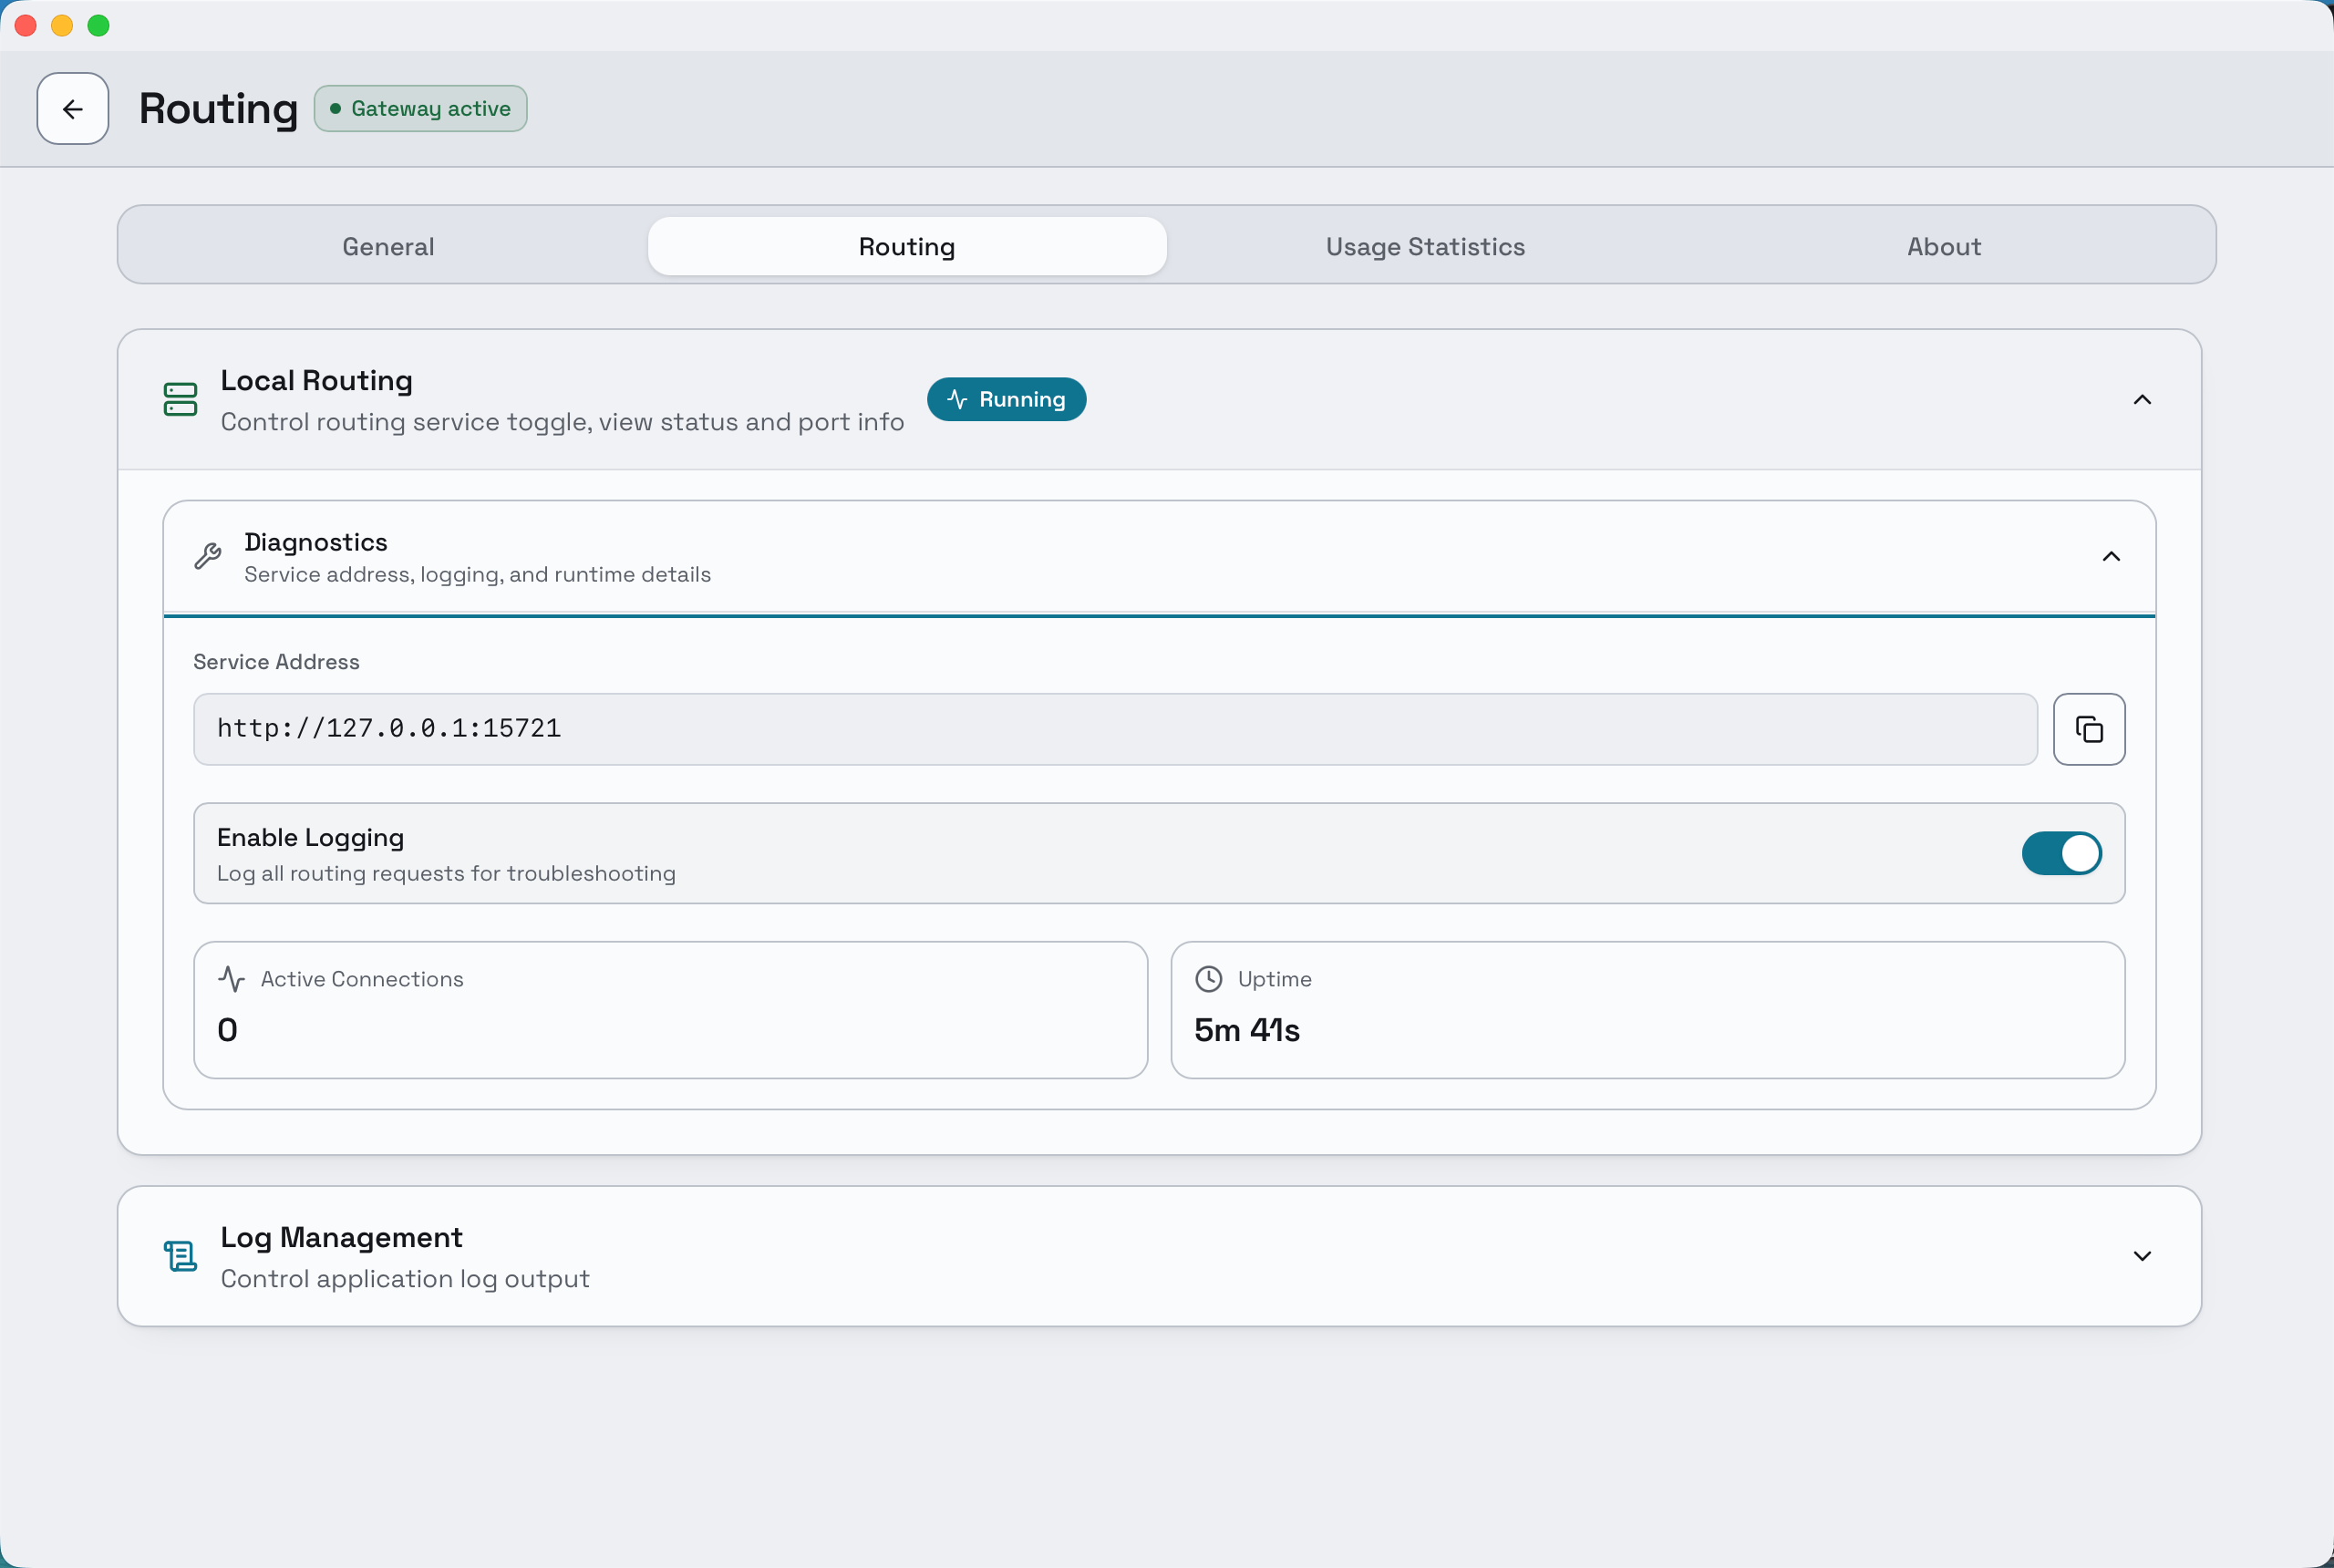
Running on the Local Routing card is the signal. Without it, a client routed through OneNexus has nothing to talk to.
Switch back before quitting
Section titled “Switch back before quitting”A client still routed through OneNexus breaks when Composer quits, since its requests depend on the local proxy.
For Codex Desktop or Codex CLI:
- Open Codex in Composer and select OpenAI Official.
- Wait for the route to become active.
- Restart the Codex client and verify one non-sensitive OpenAI Official request.
For VS Code, select GitHub Copilot on the VS Code page, then reload VS Code. Composer removes only the model group it added; the rest of your VS Code model configuration is untouched.
Switching provider does not delete sessions, though a conversation with encrypted reasoning state can still fail to resume on a different backend; if that happens, switch back to the provider that created it or start a new conversation. See Composer troubleshooting.
Leaving Composer running in the background is simpler — closing its window may only minimise the app, depending on Settings → General → Window Behavior.
Next steps
Section titled “Next steps”- Skills, prompts and MCP — manage reusable Codex tools and understand local usage statistics.
- Composer troubleshooting — work from a symptom and collect safe details for support.
- Protocol conversion — understand what the local proxy sends to each upstream provider.
- Platform quickstart — call a hosted OneNexus model directly from your own code.